How to add custom Items: Difference between revisions
Deltaflare (talk | contribs) →Preparing an Image: clarifying Dungeon Graphics nav |
Deltaflare (talk | contribs) m →Possible Errors (& Fixes): rephrase |
||
| Line 68: | Line 68: | ||
'''“Expected colors are from Palette 0” when using a non-0 palette''' | '''“Expected colors are from Palette 0” when using a non-0 palette''' | ||
[[File:Item tutorial 14 error 1.png|alt=Screenshot of error that could happen when importing into Slot 63 specifically|center|400x400px]] | [[File:Item tutorial 14 error 1.png|alt=Screenshot of error that could happen when importing into Slot 63 specifically|center|400x400px]] | ||
Even with the Palette ID number set in the UI, '''the tool first looks at the index number of the ''transparent'' color to start checking the rest.''' This means if you mistakenly used the transparent color from Palette 0 when making your sprite, the editor ''now expects everything to come from'' ''Palette 0''. “Color 49” is the black outline color in ''Palette 3''. Because “color 49” is not an expected color, the editor rejects the image. | Even with the Palette ID number set in the UI, '''the tool first looks at the index number of the ''transparent'' color to start checking the rest.''' This means if you mistakenly used the transparent color from Palette 0 when making your sprite, the editor ''now expects everything to come from'' ''Palette 0''. “Color 49” is the black outline color in ''Palette 3''. Because “color 49” is not an expected color ("color 1" is the s the black outline color in Palette 0), the editor rejects the image. | ||
'''“Expected colors are from Palette x”''' | '''“Expected colors are from Palette x”''' | ||
[[File:Item tutorial 15 error 2.png|alt=Error for uploading to slot 63|center|400x400px]] | [[File:Item tutorial 15 error 2.png|alt=Error for uploading to slot 63|center|400x400px]] | ||
Even with the transparency and outline colors corrected, you may still get an “expected colors” error, despite them matching the palette at a glance. Note that Palettes 1 and 3 share a set of greens (index 27, and index 59). Using the “incorrect green” causes the error (especially if indexing a | Even with the transparency and outline colors corrected, you may still get an “expected colors” error, despite them matching the palette at a glance. Note that Palettes 1 and 3 share a set of greens (index 27, and index 59). Using the “incorrect green” causes the error (especially if indexing a RGB-mode sprite; the drawing program could attempt to auto-assign incorrect indexes). This is why it's recommended to work directly with the colormap. | ||
To fix any of these errors, correct the offending colors in your PNG and import again. | To fix any of these errors, correct the offending colors in your PNG and import again. | ||
Latest revision as of 12:57, 11 April 2025
Adding custom items can be broken down into two parts: setting item properties and adding a sprite (if needed).
Item Settings
The following will walk you through how to customize the properties and behavior of your item.
Text
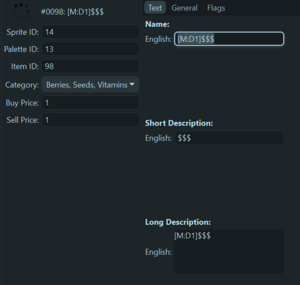
To begin, find a “dummy item” in the Items section of SkyTemple that has a name [M:D1]$$$. Double-clicking opens the item’s settings, defaulting to the Text tab. From there you can enter a name, descriptions, category, buy price, and sell price. For more detailed descriptions of these options, see Item Data. There are also options to set a Sprite ID and Palette ID. Cycling through these changes the item sprite, and the colors used when displaying it.
General
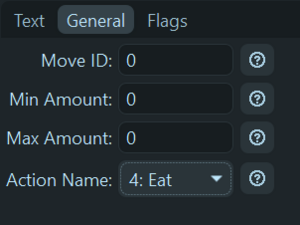
Switch to the General tab. These settings generally affect how this Item behaves in menus, including the Move ID field. Unless making a TM/HM, this should stay set to 0. For more examples and detailed descriptions of these options, see Item Data - General.
Flags
This tab has flags used to determine AI behavior in-game it looks like this . Depending on which ID you choose to edit, the "Is Valid" or "Is in T/D" switches could be flipped or not. Either way, all switches will be shown like this:
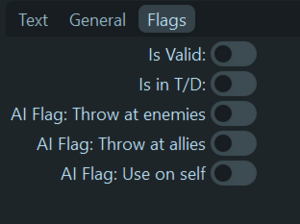
The most important one to note is “Is Valid.” This should always be on if you want to use the item! Otherwise it cannot be added to the dungeon spawn menus, and will show up as a nonfunctional Plain Seed if manually added to the Treasure Bag.
For more detailed descriptions of these options, see Item Data - Flags.
Toggle these to fit your desired behavior. Once satisfied with these settings, save before continuing.
Item Effects Code (Behavior in Dungeons)
The effects code controls what the item does when used in a dungeon. The table containing these can be found in Patches > ASM > Item Effects. Viewing this requires the ExtractItemCode patch.
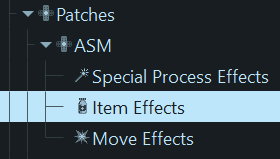
The items are sorted alphabetically. If you do not see your new item in the list, you may need to reload the ROM first. This table on the (default) Item Effects tab is where you can edit the Effect ID. By default, dummy items have an Effect ID of 86. Double-click on the number next to your item to enter a new one.
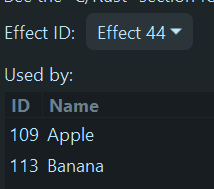
Switching to the Effects Code tab has a dropdown menu where you can better see which effect is associated with what item.
Adding Custom Effects
If you want to add any custom effects that don’t exist in the base game, that requires ASM code. You can add a new Effect ID by clicking the plus (+) button next to the Effect ID menu, which creates a new entry in the dropdown menu. Selecting it shows the “Used By” table is empty because no item is assigned to it when first created. Import the ASM file; once successful, switch back to the Item Effects tab to assign the new Effect ID to an item.
Item Sprites
The following will walk you through how to create an import an image that fits EoS's dungeon sprite restrictions.
Preparing an Image
Item sprites in EoS must be 16 x 16 pixels, set as indexed PNGs using a specific set of colors. The image below is an example of the full colormap used by all floor item sprites (don't download it from this page, it's been compressed).
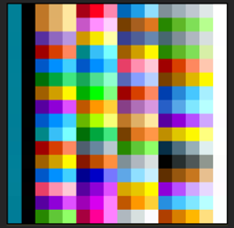
Each of the rows makes up one individual palette, 15 in total (numbered 0-14). When creating sprites, you must pick a row to use and stick with it—using colors from multiple rows will cause SkyTemple to reject the import with an error. This is where the Palette ID number from the Items Settings comes in. It determines which row (and its corresponding colors) will be used. Switching to a different Palette ID (ex: from 2 to 3, or row 3 to row 4) will still reference the same positions, but with the color mappings of the new row. This includes the transparency color (blue) and outline color (black).

A more in-depth example of this is shown below as we extract the colormap for our use.
It is recommended to start sprinting with the full colormap imported into your sprite editor, so that there are no issues with the indexes later. The easiest way to get the colormap is to export an existing sprite! Navigate to the Dungeon Graphics dropdown, and you will see a list of items for Tilesets, Backgrounds (used for Fixed Rooms, with a tutorial on those here), Traps, Items, and Color Map. The one we are interested in is Items.
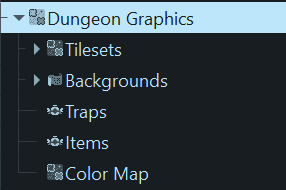
Important: The colormap seen in this section is different compared to the one exported with items. Do not use the "Color Map" entry from this dropdown unless you know what you're doing.
Exporting the Stick with the Palette ID set to 1 shows this message:
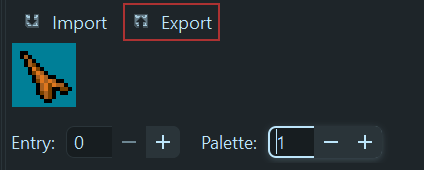
(Note: all ST screenshots are cropped to save space, the editor does not shrink this much)

This means that the sprite of the Stick will look brown, but still have the full colormap in its data. Opening the PNG in a sprite editor shows which colors will be used in each variation of the palette. Using an eyedrop tool or color selection mechanic can highlight the index of the brown being used (index 25). Finding the other shades of brown from there gives a point of reference for each row.
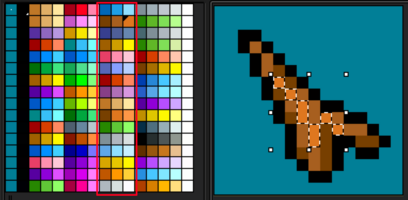
This is useful if you make a sprite that you want multiple variants of (Stick, Iron Thorn, Apple, Golden Apple, etc.).
From there, you can save the colormap in your sprite editor to load as needed and create your sprite with your chosen colors. Note that you can make/import a custom palette, but that may affect existing sprites, and is out of scope of this tutorial at the moment.
Here is an example of a Cheri Berry sprite, not intended to have variants. You can see the sprite only uses colors from Palette 3 (row 4 of the colormap).
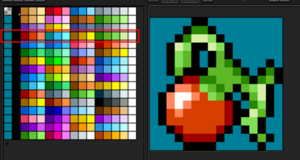
Importing an Image into Slot 63
Each item sprite in the game takes up one “slot” that is reserved for use in dungeons. To see which slots are valid to use, see the list in Item/Trap Graphics. Slots 0 – 62 are used for existing items, with slot 63 being unused in the base game. Given this, it looks like a blank blue square in SkyTemple, free to be used.
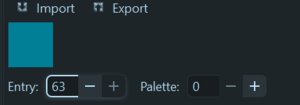
Before clicking “Import,” make sure to set the Palette ID to the number you want to use for the new item. This helps the sprite look “as intended” to check that everything looks correct. Make sure to have the “import palettes” option turned off, and the “insert as NEW image” option turned off (because this is replacing a currently blank sprite with your image).
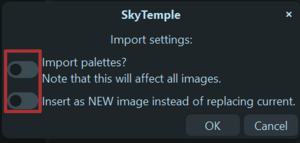
Remember that a single sprite can have multiple color variations (Berries, Sticks, etc.), so there is no need for duplicates if you have the desired color indexes matching between rows. If you are only importing one sprite, feel free to skip to Setting the Sprite. If you plan to import more sprites, read the “Importing Past Slot 63” section below.
Possible Errors (& Fixes)
Here are some examples of errors that could happen, with the tile details removed to help explain the cause.
“Expected colors are from Palette 0” when using a non-0 palette

Even with the Palette ID number set in the UI, the tool first looks at the index number of the transparent color to start checking the rest. This means if you mistakenly used the transparent color from Palette 0 when making your sprite, the editor now expects everything to come from Palette 0. “Color 49” is the black outline color in Palette 3. Because “color 49” is not an expected color ("color 1" is the s the black outline color in Palette 0), the editor rejects the image.
“Expected colors are from Palette x”

Even with the transparency and outline colors corrected, you may still get an “expected colors” error, despite them matching the palette at a glance. Note that Palettes 1 and 3 share a set of greens (index 27, and index 59). Using the “incorrect green” causes the error (especially if indexing a RGB-mode sprite; the drawing program could attempt to auto-assign incorrect indexes). This is why it's recommended to work directly with the colormap.
To fix any of these errors, correct the offending colors in your PNG and import again.
Importing Past Slot 63
As noted in Item/Trap Graphics#Sprite Slots, slots 64 - 81 will always be replaced by the game with status sprites. This means whatever you import into these slots is not permanent, and the next valid slot is 82.
By default, SkyTemple only shows entries for the existing slots. In order to reach slot, you need to import “blank” sprites. Create a PNG that uses the dungeon item colormap, filled with Palette 0’s blue transparency color. When importing, make sure to have “insert a new entry” option turned on, so slot 63 isn’t replaced.
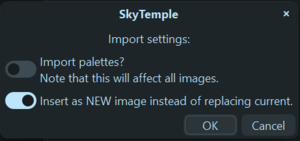
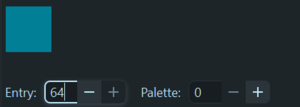
Now a new entry exists at slot 64! Continue doing this until you reach slot 81. Once you have imported a blank sprite into slot 81, you can import a proper sprite with the “insert a new entry” option turned on. This will create a permanent sprite in slot 82.
You can freely continue this process with slots 83 – 95, as needed.
Possible Error (& Fix)
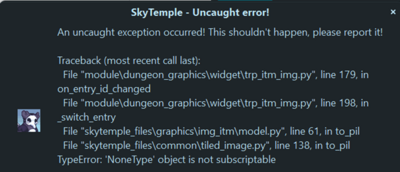
If you have any “expected color” issues, SkyTemple first will give an error showing the incorrect index, then throw an uncaught TypeError exception. This is slightly different from the error with slot 63 because SkyTemple first creates an entry, then cannot process the color data when importing. So the entry becomes invalid while the editor still tries to display it. Don’t panic! You can correct this without having to reload/close without saving! Correct the color errors and import as replacing current entry (i.e.: replacing the invalid entry with colors that the editor can properly validate).

Current Limitations - Important!
Edits to slots 96 - 103 will permanently overwrite the sprites present in that row (this includes things like Pokémon shadows).
Setting the Sprite
Now that the sprite has been imported, you can set it to be associated with your new item!
Go back to the Items > [item name] , and set the Sprite ID to 63 (or whatever index you inserted it at). Increment the Palette ID, and you will see the sprite change colors depending on the ones you used (remember the IDs start at 0).
